How to install multiple versions of Parasoft into Visual Studio

Prior to perform following action, please make sure to uninstall all Parasoft plugins for Visual Studio.
Performing the Installation
- Double-Click on our installer.
- Proceed with the normal installation steps until it asks where to install Parasoft Test.
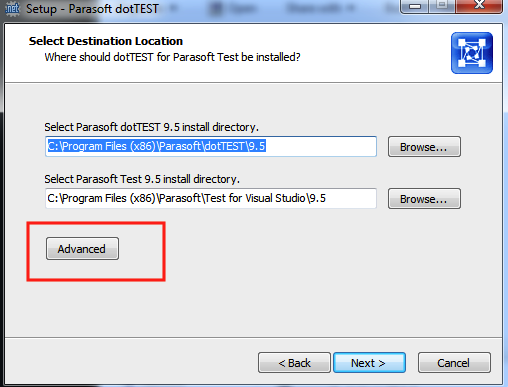
On the Select Destination Location page, locate the "Advance" button in the middle of the page.
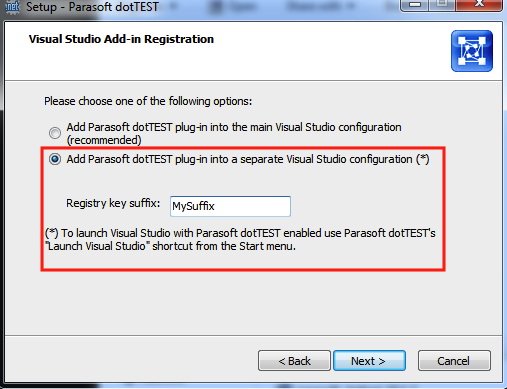
In the Advanced options, select the Radio Button that says to install with a suffix and in the text box write the suffix you would like to use. Important: Please remember or write down the suffix you used. This is needed to launch the profile the Parasoft tool was installed in.
Continue and finish with the installation.
Launching Visual Studio with the Parasoft Profile
Once the tools are installed, you can launch Visual Studio with the profile that has the specific Parasoft tool installed to it by:
1. To launch dotTEST with the profile, go to:
Start->All Programs->Parasoft->dotTEST->Launch Visual Studio
2.Right click on the executable and append /RootSuffix to the Target text box in the properties of the Shortcut executable for Visual Studio.
- On the command line:
devenv.exe /RootSuffix